HOW TO USE A DIPTANK AND WHY!

The use of diptanks has grown in popularity over the past few years, and it’s not hard to see why. Time saving, money saving and cleaner! Using a diptank to streamline your screen cleaning process can not only save you up to 60% on chemistry costs, it can also save up to 50% on labour costs, making it the most efficient way to clean screens.

Getting started with a dip tank has never been easier if you purchase the Easiway Diptank Starter kit. The kit contains everything you need to clean screens efficiently, So if you want to know how to use the diptank, follow the below steps:

Step 1: 

Preparation – Before anything, make sure you wear chemicals gloves and safety eye wear. Once ready, approximately fill your dip tank with the following ratios: 1:5 Chemical to Water. The kit comes with a 25 gallon diptank. We advise to  add 4 gallons of EasiStrip Supra and 21 gallons of water.

Step 2:

Remove any excess ink from your screen using a goop scoop or spatula and make sure to remove any screen tape. Using the Easiway 842 Screen wash provided in the kit, wipe your screen.

Step 3:

Dip your screens into the tank for 1-3 minutes or until the emulsion loosens and becomes ‘film’ like.

Step 4: 

Rinse your screen using a pressure washer to remove the left over emulsion. Make sure to rinse both sides.

Step 5: 

Use the Easiway 701n stain remover provided in the kit to remove any left over stains. Simply apply, Scrub using scrub pads provided and rinse off both sides.

Step 6: 

flood rinse the whole screen to finish.

Please get in touch on 01562 829009 or email info@screenprintworld.co.uk if you have any questions!

NEW VS. OLD: Exposure units

This month it’s all about Ryonet exposure units! You’ll have noticed over the past 6 months our Ryonet exposure units have all been changed to LED. There are a few reasons for this but the main reason is that the LED is alot more efficient at curing than standard exposure units, resulting in a harder more durable exposed screen. LED is also less intense than a metal halide system and that would be better for imaging posies that are not as solid (dense) as professionally imaged posies which would be better for people using inkjet or laser imaged films.

The older model exposure units had standard fluorescent bulbs, Which still work perfectly fine when exposing screens and there are still alot of print shops using this way to make there screens with no problems, however the new upgraded LED units have benefits such as using far less energy and offering faster exposure times, which in a fast paced printshop can be a huge timesaver. LED’s are also known to last a longer than standard fluo bulbs, they also run alot cooler that the fluo bulbs as LEDS do not get as hot. 

With all that being said, Price can also be large factor when selecting the right exposure unit for you and used can still get the job done. A used Ryonet exposure unit like this one, can be purchased for £495 + vat, where as a new LED exposure unit which is the same size is £1495 + vat. 

If you are interested in both new or used equipment and would like some more information, than please contact us on 01562 829009 or email sales@screenprintworld.co.uk! 

How To Clean Your Screens Using Franmar And Easiway!


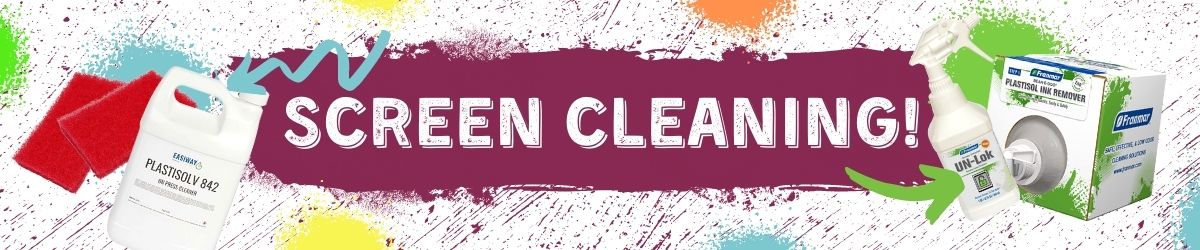
Cleaning screens is an everyday job in a print shop, so we know how hard it can be choosing the correct products to do the job as efficiently and quickly as possible. We’ve put together a step by step guide for cleaning with both our Easiway Range and our Franmar Range, To help you pick the best cleaning products for you!


Preparation:

Always use chemical gloves, mask and safety gloves when cleaning screens. 

Step 1: 

Remove any excess ink from your screen using a goop scoop or spatula. Apply Franmar Colour Change to a lint free rag and clean any remaining ink from screen.

Step 2:

Wet your screen and apply Franmar Strip-e-doo emulsion remover using a cleaning pad. Apply to both sides. Scrub Briefly and repeat on the other side. Leave the product to work for 30 seconds but do not let the product dry, then rinse both sides with a pressure washer. If emulsion is fully removed skip step 3.

Step 3 (if applicable):

If emulsion is quiet stubborn then you can use Franmar Unlok to remove it. Simply apply it straight to your screen, leave to sit for 10-30 minutes (more time may be needed for heavily locked areas). Scrub well with a cleaning pad and wash both sides thoroughly with a pressure washer.

Step 4:

Apply a minimal amount Franmar’s De Haze ES to your screen using a spray nozzle or cleaning pad, Repeat on other side and then rinse both sides with a pressure washer.

This kit comes with everything you need to clean screens using Franmar products, Along with additional extras like de-greaser, cleaning pads and handles, Spray nozzles and another ink remover option – Bean-e-doo eco plastisol ink remover!


Preparation:

Always use chemical gloves, mask and safety gloves when cleaning screens. 

Step 1:

Remove any excess ink from the screen using a goop scoop or a spatula. Apply Easiway 842 to a lint free cloth and remove any left over ink from screen.

 Step 2:

Wet screen before apply emulsion remover. Mix Easiway 500 emulsion remover concentrate with water with a 1:50 ratio. Apply to your screen both sides once mixed using a cleaning pad or brush. Using a high pressure washer, Rise both sides of the screen. After, Flood with the entire screen with a low pressure rinse from top to bottom to activate the degreasers and remove any debris

Step 3:

If stubborn stains remain, Easiway 415N can be used to remove them. Apply 415n to both sides of your screen using a cleaning pad, working it into the screen. Allow the product to dwell for 1-5 minutes (do not leave for more than 5 minutes or to dry on your screen, this may result in your screen tearing or popping!). Flood rinse the entire screen with a low pressure rinse, followed by a high pressured rinse. Please keep in mind that pro-longed contact time with Easisolv 415n may cause mesh breakdown.


Cleaning screen using a diptank:


The most efficient and cost effective way of cleaning screens is with a diptank. The solution can remain in the tank for months and can remove emulsion whilst degreasing screens in less than 5 minutes.

Preparation:

Always use chemical gloves, mask and safety gloves when cleaning screens. 

Step 1:

Depending on the size of your diptank, Your solution will need to be prepared using a ration of 1:7 Easiway Supra One Step Ink and Emulsion Remover to water. Simply add the Supra to your diptank and top up with the remaining water.

Step 2:

Remove any access ink and tape from screen before dipping in the diptank. This can pro-long your solution and prevent any ink build up in the bottom of the tank.

Step 3:

Dip your screen in the tank and use the screen holders to keep your screen submerged for 1-3 minutes until the emulsion loosens and becomes ‘film like’

Step 4: 

Remove your screen from the dip tank and place into a washout booth. Rinse your screen both sides using a pressure washer.

Step 5: 

If any stubborn stains remain you can use Easiway 415N. Apply 415n to both sides of your screen using a cleaning pad, working it into the screen. Allow the product to dwell for 1-5 minutes (do not leave for more than 5 minutes or to dry on your screen, this may result in your screen tearing or popping!). Flood rinse the entire screen with a low pressure rinse, followed by a high pressured rinse. Please keep in mind that pro-longed contact time with easisolv 415n may cause mesh breakdown.

When to change your exposure blanket

Usually it can be quiet obvious if your exposure blanket has a hole or a rip in the top, But sometimes the hole can be so small that it can’t been seen by the naked eye, Causing many problems. 

the two main things to look out for are:

1) Poor exposure. Most people think their products or process could be the issue,  But sometimes it can be down to a damaged exposure blanket creating poor suction, Causing the positive and screen to have a bad connection. 

2) vacuum taking longer than usual. If when you turn the unit on and start exposure and the vacuum is taking longer to create full suction against the screen, This could also indicate a damaged blanket. 

If any of the above are happening to you when exposing screens, Then you’ll need to do some further investigations. Check the blanket closely for any small holes, Also check the outside frame and where the pipe connects to the blanket as overtime it can become loose. You can also try and listen closely whilst the unit is exposing screens to see if you can hear any small air leaks. 

 If you find that the blanket does need replacing, We are on hand to help! We can supply a variety of exposure blankets in custom prices, All manufactured in the UK for fast turnaround times. 

Please drop us an email at service@Screenprintworld.co.uk or call us on 01562 829009 for a quote. 

New Year Machine Tips!

With the start of the new year, now is a good time for some machine maintenance, not only to keep your machine happy, but to prevent any costly repairs/down-time in the coming year! 

we’ve put together a few of our top tips that we recommend doing to keep your machine running smoothly!

1. see when you last serviced your machine. Was it more than 1-2 years ago? If so It’s probably due another soon and servicing is the best way to keep on top of important jobs that keep your machine running smoothly. Yearly services can highlight protentional future issues, saving time and money! 

2. Keep your machine topped up on oil/grease. Another important job that can sometimes be forgotten about. Think of it as running your car on low oil, It can ruin important parts and become costly to repair!  

3. See if your machines battery needs changing. This is usually done during a routine service, However if your machine has not had a service in a while, then changing the battery asap is a very good idea. If your battery runs out, Then your PLC or servo will need reprogramming, This can only be done by the manufacturers so the PLC/SERVO will need to be returned to the manufacturer which could take weeks to do. A battery would usually cost around £80-120, Whereas a reprogramme on a PLC could cost £600+ and that doesn’t include the downtime and possible lost jobs. 

4. Create a service schedule A simple spreadsheet will do the trick. Include information like serial numbers, Last service date, Next service due, Battery change date, Last oil/grease change. You could even set calendar reminders to remind you when the battery needs changing or when a service is due. 

At Screen Print World, We have a dedicated service department that can help you with any questions or book a service in if required. Just call 01562829009 or email service@Screenprintworld.co.uk for more information 

2021 SPW Product Round Up

With 2022 just around the corner, We thought we would put together a blog post reflecting on the last year of new products and even have some of our colleague’s pick their favourites! 

At Screen Print World, We are always on the look out for new and exciting products for our screen printing customers. Products that make life easier or products that can create something new, We never stop trying to source the best.

This year has been no exception for new products.. One of our biggest launches was our Spot On Range and rebrand! We wanted to offer quality, affordable inks that every screen printer could use. Our Spot on Hybrid range was a hit with many of our customers, Offering all the benefits of plastisol like staying open in the screen, Whilst still providing that super soft feel of water based! We even added Fluorescent tints that can be added to our hybrid bases to create super bright fluro colours.

Another exciting new product added this year was our Snap Screens, A unique system aimed at the screen printer than requires full control over their own screen re-stretch process. The simple 3 step process allows you to get high tension screens in minutes whilst using superior grade aluminium frames and mesh!

It’s also been a big year for machinery here at SPW. M&R launched the all new copperhead range..an affordable and innovative new automatic range, made with the M&R quality that everyone knows and loves. 

We also launched 2 new machines..The MTEX DTF and T-FOLD Table Top Folder. With the way the industry is changing, it seemed the right time to source a high quality DTF machine and MTEX was the perfect fit. They have created an all-in-one Printer, shaker and dryer using quality components that can print direct to film with ease. No need for pre-treatment or post-treatment and can result in stunning prints on both light and dark garments. 

Being suppliers of large folding and bagging solutions for quiet a while now, It was important for us to offer an affordable option to smaller printers that could provide an easier alternative for bagging and folding without breaking the bank. The T-FOLD can fold a t-shirt in around 5 seconds, And fold and bag in 6 seconds, All whilst taking up little space in your printshop and running on a standard 13amp plug, So no need for an expensive compressor to run it! The inbuilt bagging arm and bag inflation can making bagging super easy too!

Now onto some of our personal favourite picks! 

The All New Copperhead Pro Max From M&R Global

Introducing the all new Copperhead Pro Max from M&R Global, The new affordable press with innovative design and construction.  M&R global have sourced the very best components from across the world to bring you quality that M&R are known though-out the industry for. 

The new Copperhead Pro Max comes with an in-built squeegee pressure equalizer system, making reproduction of the same colours and jobs easier without high-skilled labour requirements. Manual adjustments are no longer required, as the equalizer system automatically balances the printhead pressure. Even ink deposition and equal pressure on all four corners maintains consistent and precise printing. The linearization process helps to maintain the highest quality halftones. Process optimization reduces the time needed from sampling to final production.

The machine comes with lightweight honeycomb pallets with soft top rubber pads to avoid access overheating after flashing, which is one of the key features for printers using water based or discharge inks. The rubbers compression allows the garment weave to flex and stretch when the squeegee presses it into the rubber. This stretch behaviour provides for better penetration of the ink into the garment, thus increasing the ‘hand’ quality and durability of your print. The Rubber acts to reduce mesh degradation and emulsion breakdown and will require less overall screen attention during a print run. 

The Copperhead Pro Max also comes with electric printheads, tool free squeegee/flood bar angle adjustments, Pneumatic frame locks and independent squeegee/flood speeds, Providing operators with all the time-saving features needed for quick set-ups. You’ll also be glad to know that the new Copperhead Pro Max is compatible with the Tri-Loc system, Which further minimizes set up and maximizes run times and productivity. 

For more information email us sales@screenprintworld.co.uk, call us on 01562 829009 or use our instant chat function! 

Which White Ink Is Best For You?

Choosing a white that’s best for you is not easy when you have lots to choose from, so today we are going to break down the whites we do and their uses, Helping you find the perfect white for you!

Flash Flash White Extra

One of our best sellers, the Amex Flash White Extra Plastisol is a standard opaque bright white, perfect as an undebased ink. It’s Phthalate and heavy metal free and due to it’s fine milling, offers a soft feel and good elasticity. It’s a hit with all our customers with multiple 5* reviews!

Spot On Low Bleed White 

Our Spot On Low Bleed White is a budget friendly press ready plastisol ink that prevents ink bleed on troublesome fabrics. It has great printability, A soft feel finish and is perfect for printing onto dark garments!

Spot on Polar Flash White

Our very affordable Spot on Polar Flash White is perfect if your on a budget but still want a great quality plastisol white that’s the perfect all rounder. Great printability, Great Value and Great washing resistance!

Amex Dye Blocking Low Bleed White 

Amex dye blocking plastisol ink is perfect if your require a dye blocking/low bleed under base white. It prevents ink/dye bleed and has low flash cure times, whilst still providing good washing resistance and a bright white finish!

Amex Flex White Plastisol Ink

Amex Flex White has been designed specifically for stretchy fabrics such as sports/gym wear. As with all AMEX inks, it is phthalate and heavy metal free. It offers a soft feel, good washing resistance and a bright white finish.

Amex PF Low Temperature White 

AMEX Low Temp White is designed to be cured at a lower temperature compared the other whites. Perfect for garments that require a lower curing temp such as polyester, Whilst still offering a soft feel, and good matte down properties.

Spot On Universal Mixing White

As the name suggests, Our Spot On Universal Mixing White can be used successfully in most mixing systems where a mixing white is required. It’s not designed to be used as an under base white or direct printing white, but can be used as a highlight white if necessary.

Amex Waterbased White Extra

If you prefer to print with water based, our AMEX Water Based White Extra is our go to water based white. It’s a ready to print water based that is Formaldehyde, PVC and heavy metal free and is perfect if you’re going down the eco-friendly route. It provides a bright opaque finish on dark garments as well as super soft feel.

Spot On Hybrid Brilliant White 

Spot On Hyrbid white was specifically formulated to combine the benefits of both water based and plastisol printing. It doesn’t clog your screen like traditional water based inks, But you still get the great soft feel of water based inks once printed.

When printing any new inks, we strongly recommend testing thoroughly and wash testing before commencing with any  print run.

CHRISTMAS OPENING TIMES


We are closing for Christmas on the 23rd December at 5pm

and return to the office on the 4th January at 8:30am. 


Last orders for Christmas delivery need to be placed before 1:30pm on

Tuesday 21st December. Any orders placed after this time will be

shipped when we return on the 4th January 2022. 


FREE DELIVERY BLACK FRIDAY DEAL!

It’s one of the biggest weekends of the year to grab yourself a deal, And we are doing something we’ve never done before. We are offering FREE delivery, NO MINIMUM ORDER AMOUNT, Starting from 12:00am FRIDAY 26th and ending 12:00am MONDAY 29th November! See below terms and conditions of the deal:


*CLICK HERE FOR OUR STANDARD DELIVERY TERMS AND CONDITIONS

*DOES NOT INCLUDE PRE 12 SATURDAY DELIVERY – OPTION TEMPORAILY DISABLED ON THE WEBISTE

*FIXED RATE SHIPPING ITEMS NOT INCLUDED: all Washout booths, drying racks, exposure units, selected heat presses, Drying cabinets (These carry a shipping charge of £65)

*ONE PROMOTIONAL CODE PER ORDER